
How to Convert a Jupyter Notebook to PDF
Have a .ipynb file? Convert it to a PDF in your browser — no Python, no LaTeX, no upload.
To convert a Jupyter Notebook to a PDF you have three options: export it from Jupyter with nbconvert and a TeX installation, print the notebook from your browser, or run the .ipynb file through a converter that lays the notebook out for you. The first two need a working Python environment on the machine you are sitting at. The third does not — it reads the notebook JSON and draws it directly.
Which one you want depends on what you have:
- You have Jupyter running and LaTeX installed →
nbconvertis the canonical route, and it typesets formulas properly. - You just need a readable copy right now → your browser's print dialog works, but you get the live page, including the UI around it.
- You have a
.ipynbfile and nothing installed → convert the notebook to PDF in your browser.
Why the usual route needs so much setup
nbconvert is the official exporter, and for the PDF target it does not write PDF directly. It converts the notebook to LaTeX first and then runs a TeX engine over it. That means a working TeX distribution — several gigabytes if you install the full thing — plus any LaTeX packages your notebook happens to use.
That is fine on a machine you control. It is a lot to ask when you:
- received a notebook from someone else and only need to read or share it,
- are on a managed laptop where installing TeX is not an option,
- exported from Google Colab and just want the file on disk,
- are sending the notebook to someone who will never open Jupyter at all.
A browser-based converter avoids the dependency chain entirely: .ipynb is a JSON file, and everything needed to lay it out — markdown cells, code cells, saved outputs, embedded images — is already inside it.
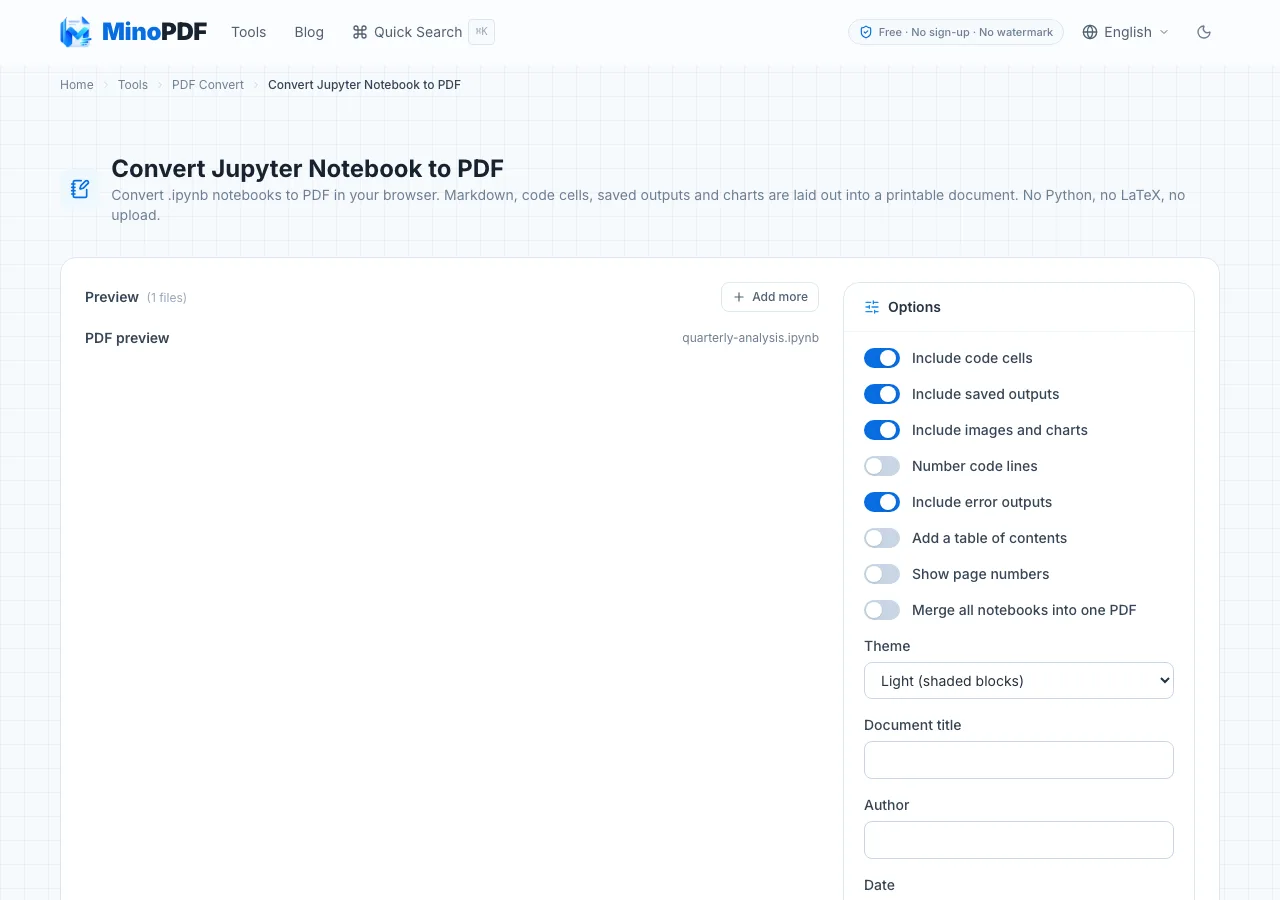
Convert a notebook to PDF in your browser
- Open the IPYNB to PDF converter.
- Add one or more
.ipynbfiles. Notebooks downloaded from Google Colab work as they are. - Choose what to include — code cells, saved outputs, images and charts, line numbers, error outputs — then set page size, orientation, theme, font size and margins.
- Check the preview and download. Each notebook becomes its own PDF, or you can take them together as a ZIP. Up to 50 notebooks per run, with no signup.
The converter shows a summary as it reads the file — how many cells were found, how many images, and how many outputs had to be skipped. That summary is worth a glance before you download, because it tells you whether anything was left out.
What actually goes into the PDF
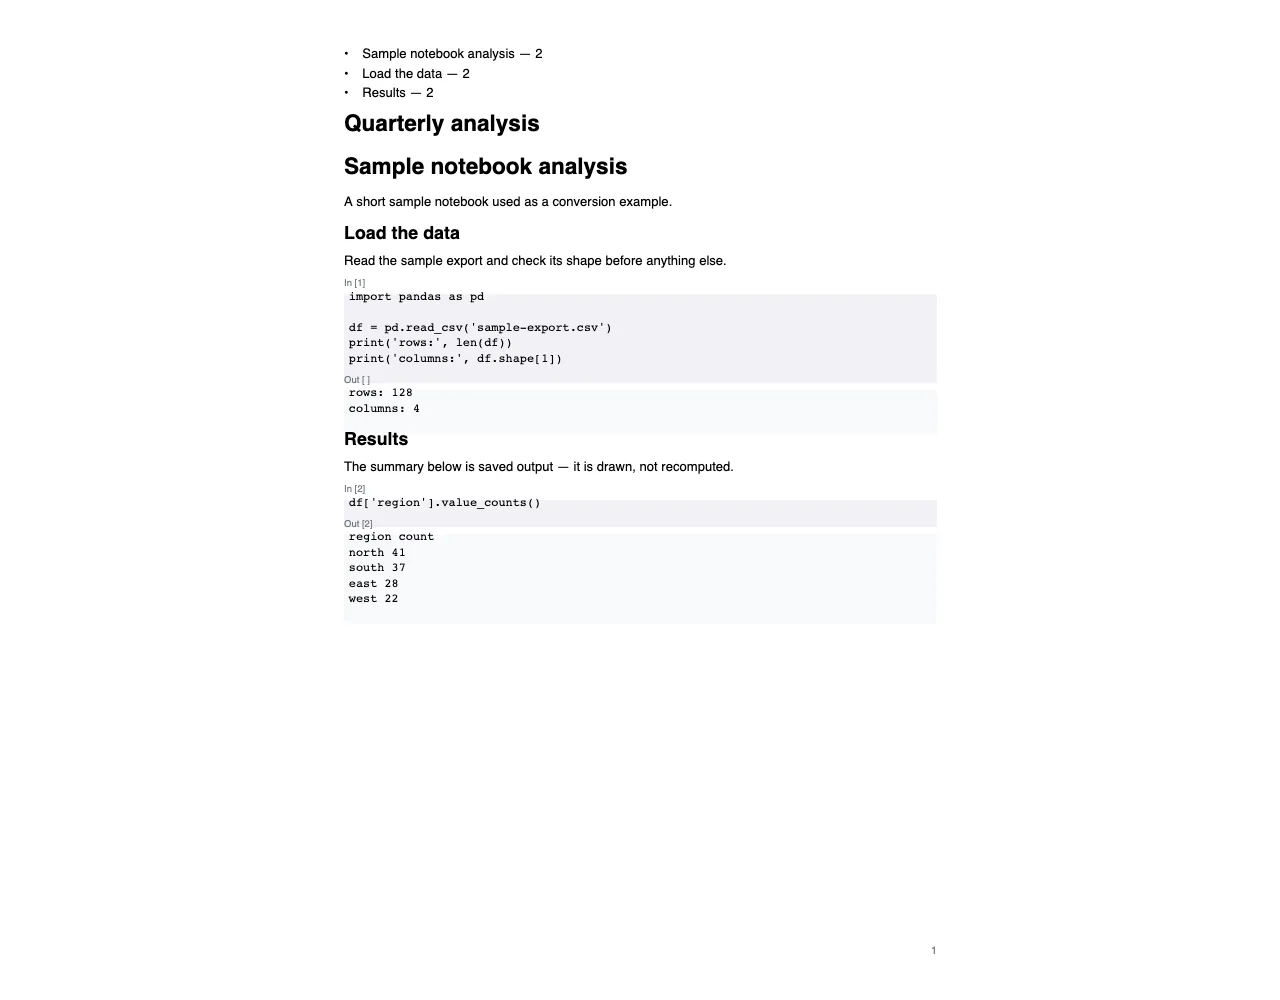
A notebook is a list of cells, and the PDF follows that order:
- Markdown cells become headings, paragraphs, lists, tables and horizontal rules.
- Code cells are drawn in a monospace block, keeping indentation, with an
In [n]label. - Saved outputs keep their own monospace blocks with
Out [n]labels. Error tracebacks get a visually distinct block. - PNG and JPEG charts are embedded as images at the size they were saved.
Nothing is recomputed. If a cell has no saved output, there is nothing to draw for it — see the section on missing outputs below.
Choose what goes in: the five switches
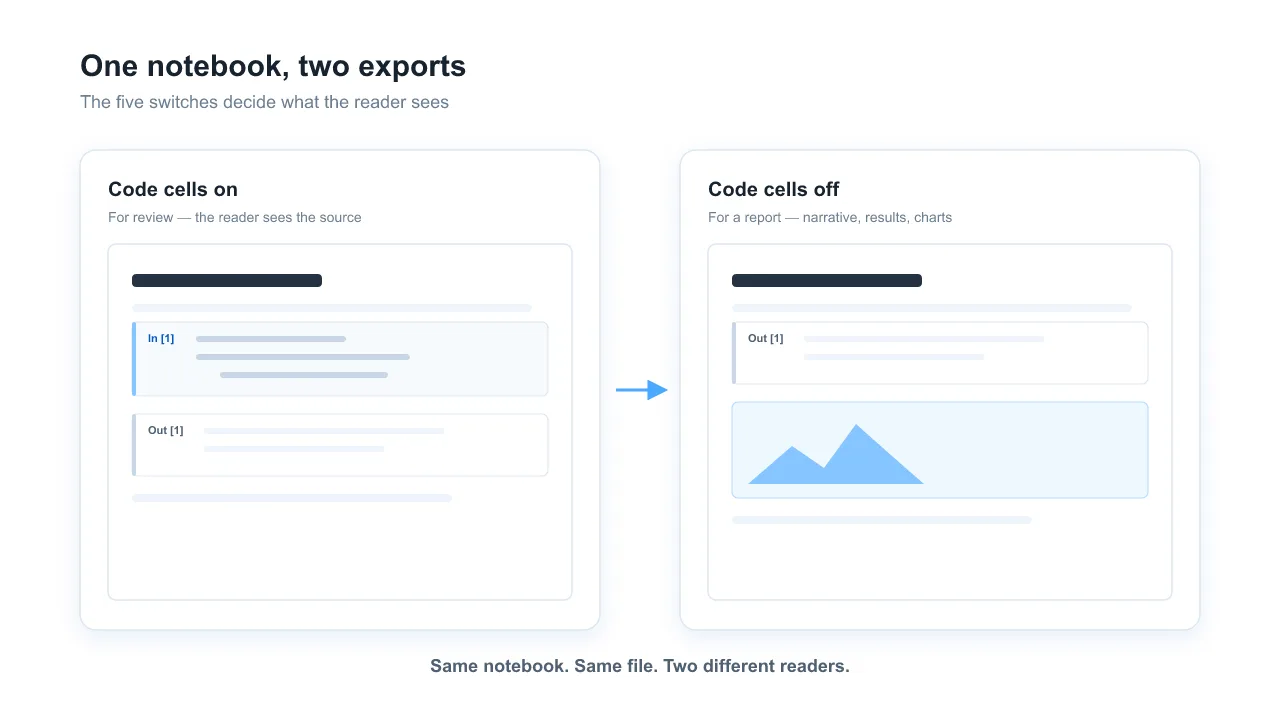
The most useful part of the export is deciding what a reader actually needs to see.
| Option | Include it when | Leave it out when |
|---|---|---|
| Include code cells | A reviewer or colleague needs to read the code | You are delivering a report and only the narrative, charts and results matter |
| Include saved outputs | The results are the point of the document | You want a clean reading copy without printed dataframes |
| Include images and charts | Charts carry the argument | You need a much smaller file — images dominate notebook PDF size |
| Number code lines | You will discuss specific lines with someone | You want the least visual noise |
| Include error outputs | The traceback is part of the record | You are sharing a finished notebook and stale errors would confuse the reader |
Turning code cells off turns a notebook into something close to a report: headings, prose, charts and results, with no source code. Turning images off is the fastest way to shrink the file.
Layout settings that matter
- Page size — A4 or Letter.
- Orientation — Portrait for normal reading; Landscape for notebooks with wide dataframes or large charts.
- Font size and Margin — the two knobs to use when a notebook is just slightly too long or too wide for the page.
- Theme — three options: Light (shaded blocks) for screen, Print (ink-saving, no shading) which drops the grey backgrounds behind code and output blocks and marks them with a thin rule instead, and Dark (screen reading).
Long code lines wrap rather than running off the edge of the page, so a wide dataframe is readable in portrait if you drop the font size a little.
Titles, contents and page numbers
The converter can write a Document title, Author and Date at the top of the PDF — and into the PDF's own metadata, so the file identifies itself correctly when someone opens it.
Turn on Add a table of contents and it is built from your Markdown headings, with the real page number each heading lands on. This is the single setting that most improves a long notebook: heading levels are already in the file, and a real table of contents makes a 40-page export navigable.
Header text and Footer text repeat on every page, and Show page numbers adds the numbering. A footer with the notebook name and page number is worth setting before you print anything.
Notebooks from Google Colab
Colab can export to PDF itself, but the result is a print of the live page and often splits wide output across awkward page breaks. If you want a file you control:
- In Colab, choose File → Download → Download .ipynb.
- Upload that file to the converter.
- Use Landscape with a smaller margin — Colab notebooks tend to hold wide dataframes and large charts.
The downloaded .ipynb contains the outputs as they were last saved, so run the notebook in Colab first if you need fresh results.
Several notebooks at once
Add as many .ipynb files as you need. By default each one becomes its own PDF, downloadable individually or together as a ZIP.
Turn on Merge all notebooks into one PDF and they are concatenated in file order into a single document, each keeping its own content and pagination. Use merge when the notebooks are chapters of one deliverable; leave it off when they are separate submissions.
Why some outputs are missing
Three situations produce an incomplete PDF, and none of them are silent:
- The output was never saved. A cell that was never run, or whose output was cleared, has nothing to render. Run the notebook in Jupyter or Colab and save it again.
- The output cannot be drawn. SVG graphics the browser could not rasterize, very large JSON blobs, and output types with no text or image representation are skipped and listed in the report.
- The output is interactive. JavaScript widgets and iframes are never reproduced — a PDF cannot run them.
Check the summary the converter shows after reading the file. It reports how many outputs were skipped, which tells you whether the PDF is complete before you send it anywhere.
LaTeX formulas: kept as source, not typeset
This is the one thing the browser route genuinely cannot do, and it is worth knowing before you choose it.
Mathematical expressions are kept as readable source text, exactly as written in the notebook: $...$ and $$...$$ stay as they are instead of being typeset into proper equations. Shipping a TeX engine to the browser is not something this lightweight renderer does.
For a notebook with heavy mathematics, nbconvert with LaTeX is still the right answer. For code, documentation and charts, source-text formulas are usually acceptable — and if they are not, you will know from the preview before you download.
Does the converter run your notebook's code?
No. Executing arbitrary Python from an uploaded file would be unsafe, so the tool only draws the markdown, code and outputs that are already saved in the notebook.
The practical consequence: if you need fresh results, run the notebook in Jupyter or Colab first, save it, and then convert. The conversion itself never evaluates anything.
Is my notebook uploaded?
No. Parsing, image embedding and PDF writing all run in a Web Worker in your browser. The file does not leave the device, and no notebook content is recorded.
This matters more than it might sound for notebooks: they frequently contain connection strings, API responses, internal URLs and sample data that was never meant to be shared with a third-party service.
Frequently Asked Questions
What is an IPYNB file?
An IPYNB file is a Jupyter Notebook document — a JSON file holding markdown cells, code cells and the outputs that were saved when the notebook last ran. Because the outputs are stored inside it, the file can be rendered without running anything.
Do I need Python, nbconvert or LaTeX installed?
No. The notebook JSON is parsed and laid out in your browser, so there is no Python environment, no nbconvert command and no TeX distribution to install. You only need the .ipynb file.
Can I export a notebook without the code cells?
Yes. Turn off Include code cells and you get the markdown narrative, charts and saved results only. The original notebook file is never modified — the change applies to the PDF.
Will my charts and plots be included?
Yes, if they were saved as PNG or JPEG images in the notebook, which is what matplotlib and most plotting libraries produce by default. Turn off Include images and charts if you want a text-only, much smaller file.
Why are some outputs missing from my PDF?
Outputs that cannot be drawn are skipped and listed in a report: SVG graphics the browser could not rasterize, very large JSON blobs, and output types with no text or image representation. Interactive JavaScript and iframes are never reproduced. Outputs that were never saved in the notebook are simply not there to draw.
Can I convert a Google Colab notebook to PDF?
Yes. Download the notebook from Colab as .ipynb and upload it. Wide dataframes and large charts usually look better in landscape orientation with smaller margins.
Can I merge several notebooks into one PDF?
Yes. Turn on Merge all notebooks into one PDF and all uploaded notebooks are concatenated in file order into a single document. With merge off, every notebook becomes its own PDF and you can still take them together as a ZIP.
Can I make the PDF cheaper to print?
Yes. Choose the Print (ink-saving, no shading) theme: it drops the shaded backgrounds behind code and output blocks and marks them with a thin left rule instead, so the structure stays readable without large grey areas.
Are LaTeX formulas rendered as equations?
No. They are kept as readable source text, not typeset — $...$ and $$...$$ appear exactly as written in the notebook. If you need typeset mathematics, use nbconvert with a TeX installation.
Related Tools
- IPYNB to PDF — one PDF per notebook, merged into one, or all of them as a ZIP.
- Markdown to PDF — turn a plain Markdown document into a clean PDF.
- HTML to PDF — convert an HTML page or saved web document into a PDF.
Have a question or feedback? Contact us